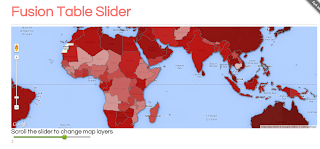
 This Tutorial will show you how to customize FuisonTableSlider to your data set and create a data visualization project with it. It will walk you through adding the fusion table layers to Google Maps API (v3) and creating your first visualization web application.
DEMO on GitHub
This tutorial is for beginners I assume that you have some knowledge of HTML but you don't' have to be a expert in HTML or Google Maps API. Just remember coding it's intelligent copy & paste.
What you need to develop multi-layered Google map with slider ?
1. Uploaded data to Google Fusion table and created map. Remember if you want to present data in polygons you must use KML file with proper references. You can find a lot of KLM files in internet.
2. Each layer is separate fusion table, so if you want to show map with 3 layers, showing change over years in three years you must prepare 3 separate fusion tables with maps.
3. You need to download from GitHub my project.
4. Below is code in HTML file (index.html), the only file you need to modify to your slider works.
Lines to change
[3]Change title.
[13] This coordinates it's where your map will be centered
[16] Zoom level, optional to modified
[17-22] Map Controls (false/true) , optional to modified
[29 & 39] Fusion table location column is an existing geocoded column of type Location. For example country names or county names, zip codes etc.
[30 & 40] Fusion Table ID, you can use FT Wizard to extract ID
[32-33 & 42-43] Fusion table style and template ID, you can use also Wizard.
TIP. You can add more layers just copy paste the code and name it as next layer ie. layer3, layer4.
If you want to customize your slider change parameter in lines [76], below list of options
| <input type="text" data-slider="true"> | |
| <input type="text" data-slider="true" data-slider-theme="volume"> | |
| <input type="text" value="0.2" data-slider="true"> | |
| <input type="text" data-slider="true" data-slider-step="0.1"> | |
| <input type="text" data-slider="true" data-slider-range="10,1000"> | |
| <input type="text" data-slider="true" data-slider-range="100,500" data-slider-step="100"> | |
| <input type="text" data-slider="true" data-slider-range="100,500" data-slider-step="100" data-slider-snap="true"> | |
| <input type="text" data-slider="true" data-slider-values="0,100,500,800,2000"> | |
| <input type="text" data-slider="true" data-slider-values="0,100,500,800,2000" data-slider-snap="true"> | |
| <input type="text" data-slider="true" data-slider-values="0,100,500,800,2000" data-slider-equal-steps="true" data-slider-snap="true"> | |
| <input type="text" data-slider="true" value="0.8" data-slider-highlight="true"> | |
| <input type="text" data-slider="true" value="0.4" data-slider-highlight="true" data-slider-theme="volume"> |
Demo of the Simple Slider styles.
After all upload files to your server, remember to upload all files index.html, simple-slider.css and simple-slider.js


Hello Piotr, could you kindly show how you can add multiple sliders?
ReplyDeleteYour tutorial works very well but if I add more, it doesnt work. Thank you very much,